Your AI Agent
Agents, and the agent form
The AI Agents list
What is this screen for?
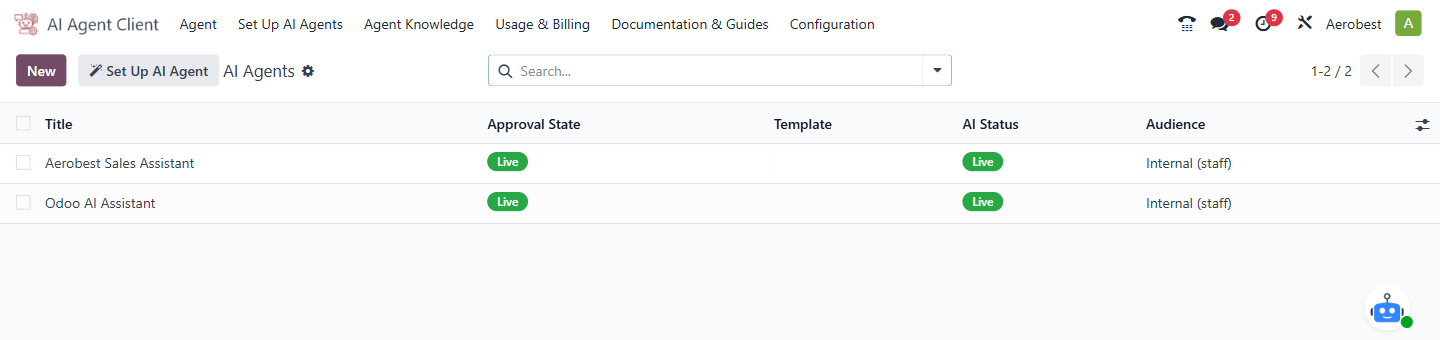
The AI Agents screen lists every AI agent in your Odoo database, showing each agent's name and its AI Status.
Who uses it?
Administrators at your organization.
What do you actually do here?
From this screen, you can:
- View the AI agents that already exist.
- Open an agent to view or edit its configuration.
- Click New to create a new AI agent.
- Use the search bar to find a particular agent.
- Check each agent's AI Status: Live, Setting up or Not connected. AI Status is about the connection only: an agent answers only when its Approval State is also Live.
What do you do when it looks wrong or empty?
No agents listed: After a fresh installation, this list will be empty. Click New to create your first agent.
No agents are pre-configured during installation. To set up default agents (such as HR Assistant or Sales), click the Set Up AI Agent button at the top of the list. This walks you through a guided setup for each template. → The guided setup wizard
An agent shows "Not connected": It tried to connect when it was saved and could not. Open it: a yellow banner at the top of the Agent Instructions tab has a Retry Connection button, and the chatter says why. If the agent has not been approved yet, Retry Connection tells you so, and the agent connects when an administrator uses Approve & Go Live. If it keeps failing, check Install and connect with Test Connection.
Agents you expect are missing: Check whether a search filter is active — clear the search bar and remove any active filters.
Agents can be archived. Archived agents are hidden from the list; choose Filters → Archived to see them.
The agent form
What is this screen for?
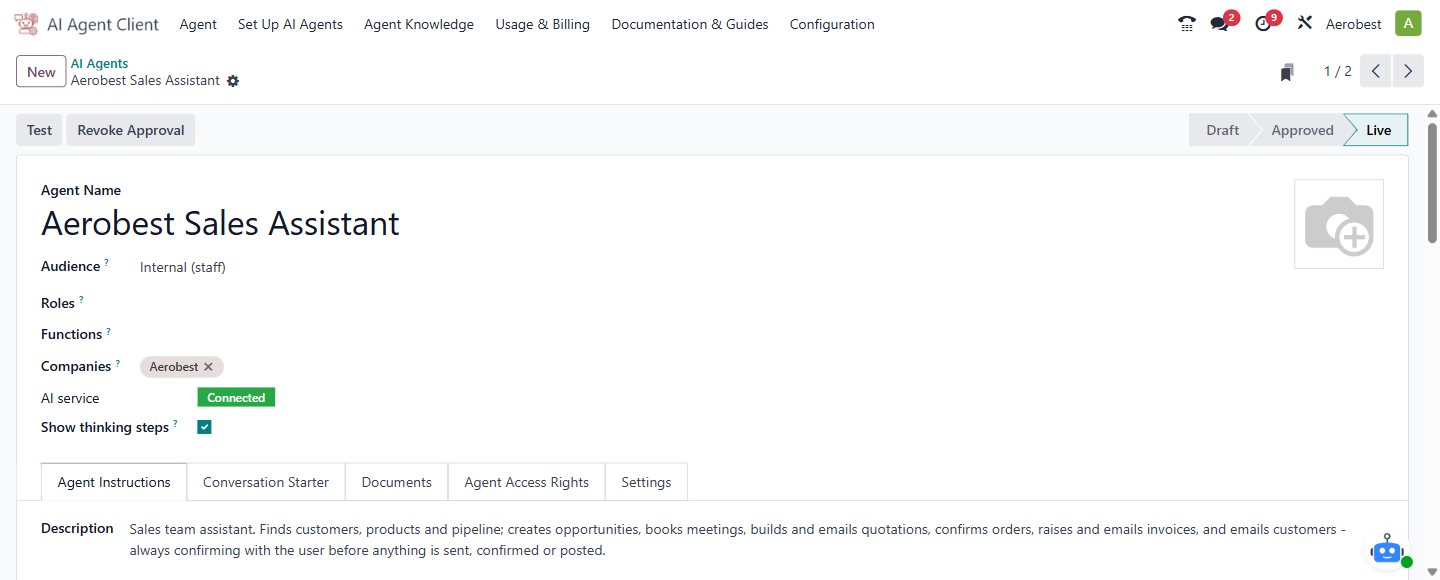
The Agent form is where you configure an individual AI agent — its name, company assignment, and connection to the AI service. The tabs below contain the agent's detailed setup.
What do you actually do here?
The top section of the form contains the agent's core settings:
Agent Name — the display name your users will see when interacting with this agent.
Companies — which companies in your Odoo database have access to this AI agent. Leave empty to make the agent available to all companies.
AI service — shows the connection status. A green Connected badge means the agent can communicate with the AI service. A yellow Not connected yet badge means it could not connect when it was saved, so it cannot answer yet; use Retry Connection in the yellow banner at the top of the Agent Instructions tab.
Show thinking steps — when ticked (the default), the chat shows the agent's progress while it works, for example "Searching products…". When unticked, the user sees a plain typing indicator instead.
Agent image (top right) — hover over the picture and click the pencil icon to upload an avatar for this agent.
Below these fields are the agent's tabs: Agent Instructions, Conversation Starter, Documents, Agent Access Rights and Settings.
ℹ There is no separate "Script" tab. What older Odoo screens call Script is the Conversation Starter tab, renamed. The step-by-step chatbot builder it used to show is hidden unless developer mode is switched on, because an AI agent never uses it.
What do you do when it looks wrong or empty?
AI service shows "Not connected yet": Click Retry Connection in the yellow banner at the top of the Agent Instructions tab; the chatter gives the reason. If the agent has not been approved yet, Retry Connection tells you so, and it connects when an administrator uses Approve & Go Live. If it keeps failing, check Install and connect with Test Connection.
Companies field is wrong or missing: The Companies field restricts which companies can access this agent. If it shows the wrong company, update the field directly. Leave it empty to make the agent available to all companies.
"Provision this agent first" banner — this appears when an agent exists in Odoo but has not yet been created on the AI service. Provisioning is a separate step from the database-level connection: the Install and connect screen is about your whole database's link to the AI service, while this banner is about one specific agent. You must provision the agent before you can add documents to it.